
Connecting Platforms
Connect platforms in the Integrations tab. With nothing connected you land on "Add platform"; once one is connected you land on "My integrations".
How to connect
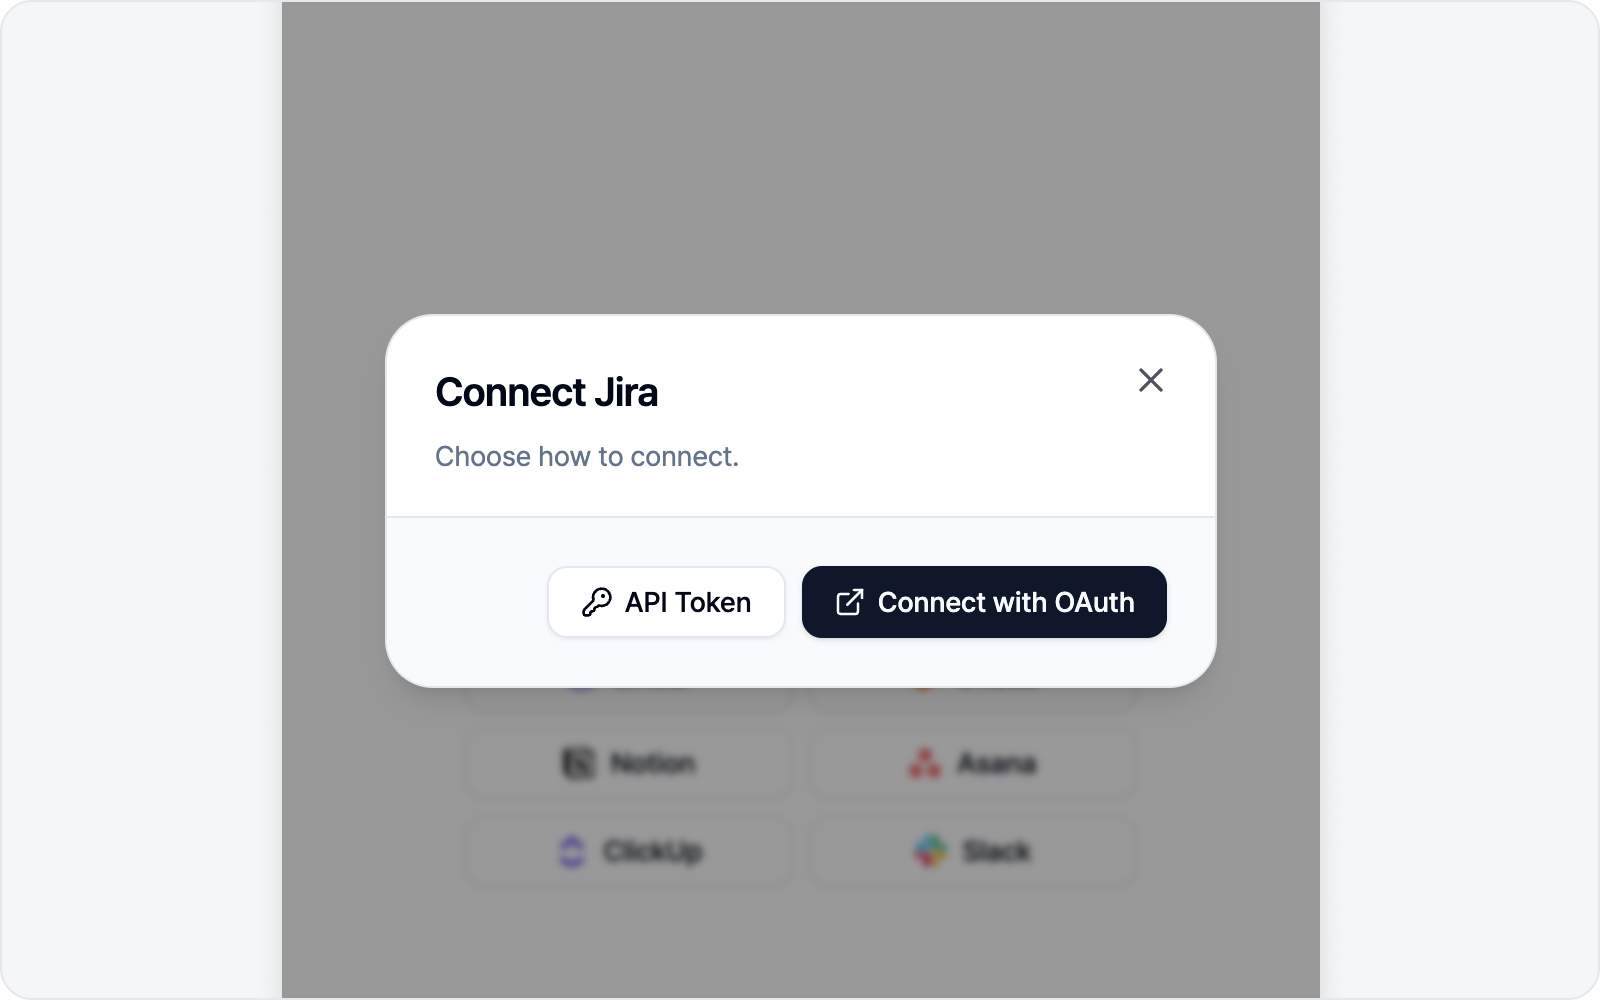 Connect-method dialog
It's simpler than it sounds — three steps and you're done.
- In "Add platform", pick the platform you want to connect.
- When the connect-method dialog appears, choose OAuth (browser login) or enter a token directly.
- With OAuth, just approve access in the login window. With a token, paste the token you generated along with any required fields.
OAuth is usually the easiest. That said, if your org policy blocks OAuth or you'd rather use a token, the token method works just as well. Note that Slack supports OAuth only, so hitting "Connect Slack" takes you straight to the login window.
Below those eight sits Custom Webhook, on its own line under a divider. It isn't a service BugShot set up for you — it's a way to send reports to a server you built yourself, which is why it doesn't sit in the brand grid. The Custom Webhook guide covers setup and delivery.
What each platform needs
| Platform | Connect method | Fields when using a token | Generate a token |
|---|---|---|---|
| Jira | OAuth / API Token | baseUrl, email, apiToken | id.atlassian.com → API tokens |
| GitHub | OAuth / PAT | PAT | github.com/settings/tokens |
| Linear | OAuth / API Key | apiKey | linear.app security settings |
| Notion | OAuth / Internal Token | token | notion.so integration |
| GitLab | OAuth / PAT | instanceUrl (self-managed only — https addresses only; localhost is exempt), pat | gitlab.com PAT |
| Asana | OAuth / PAT | pat | app.asana.com my-apps |
| ClickUp | OAuth / API Token | pat | app.clickup.com Settings > Apps |
| Slack | OAuth only | — (no token entry) | — |
| Custom Webhook | Enter the address yourself | The receiving address (https only — an internal network or localhost may use http), secret (optional) | — (a server you built) |
Slack — a quick share to a channel or DM
Slack is a messaging app rather than an issue tracker, so it works a little differently from the others. It's perfect for when you want to drop a quick "hey, this is broken" into a team channel before filing a formal issue.
- Posts as you: connect via OAuth and messages go out under your own name (not a bot). That means there's no bot to invite into channels.
- Where it goes: pick any public channel, private channel, or DM you're a member of. (Channels you haven't joined won't show up in the list.)
- Title in the channel, details in a thread: the title posts as a message in the channel, while the details — environment info, style changes, log summary — plus screenshots, video, and log files land as thread replies under it. Your channel timeline stays clean with just the one-line title.
- Mentions: pick members to mention and they'll be pinged by
@namein the message.
Slack messages don't have an "open/closed" state, so the issue list just shows "Submitted"; click it to jump straight to the message.
Promote to a real tracker later
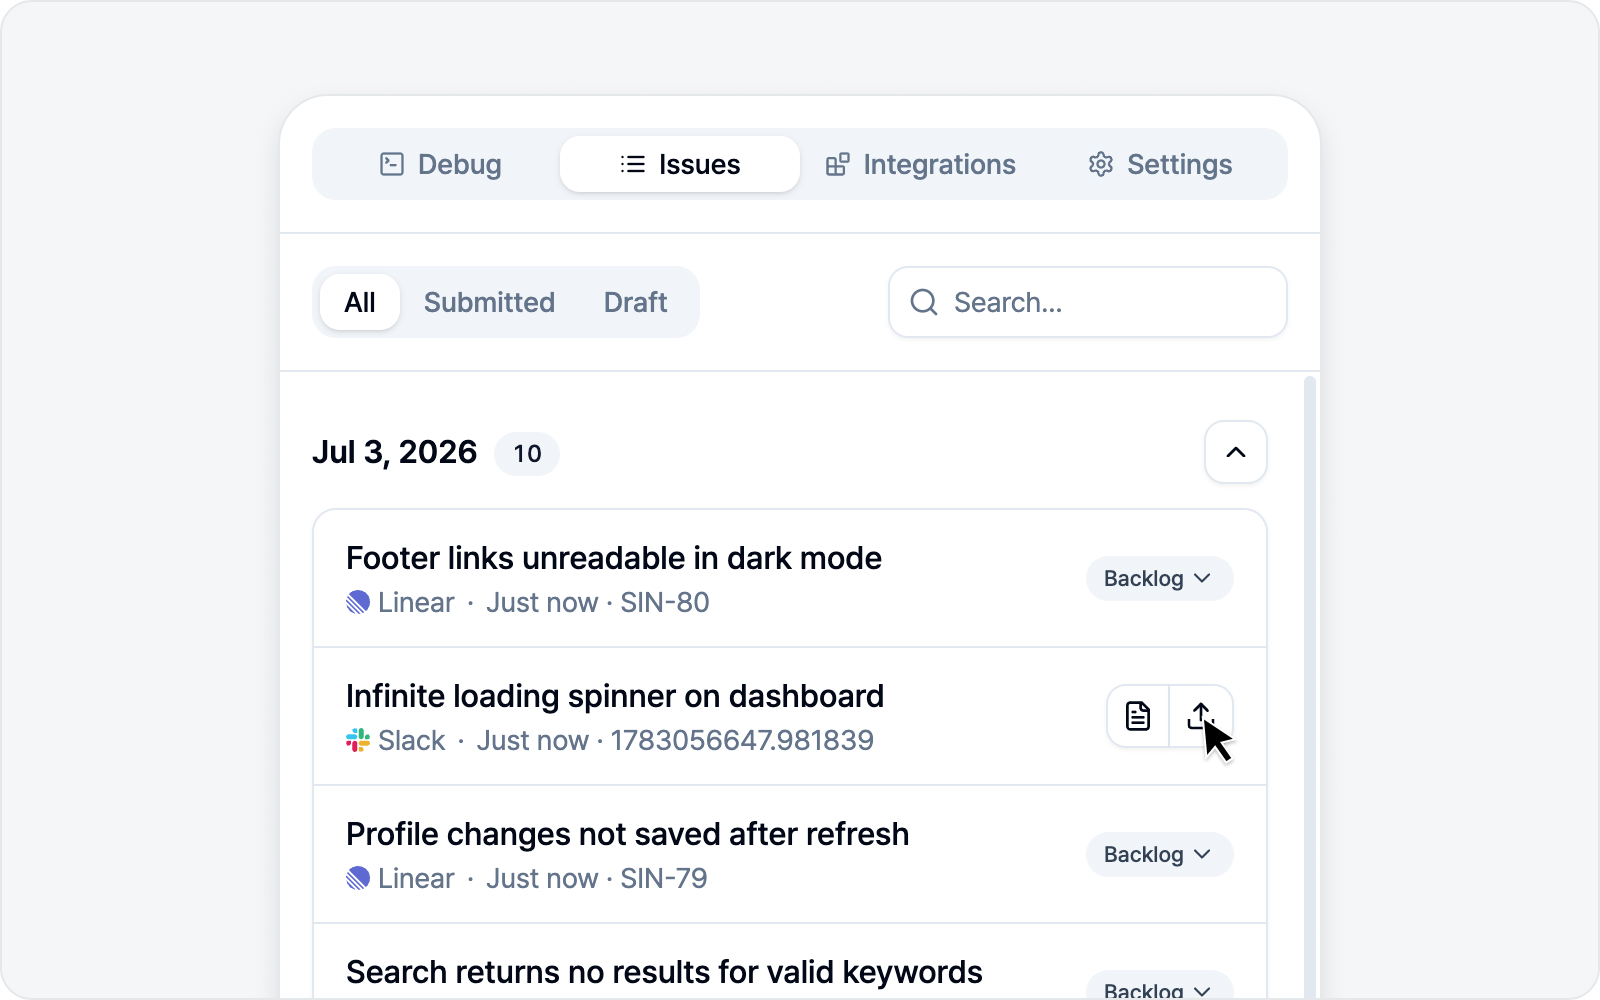 View details and Promote buttons on a Slack card
Shared something to Slack and then realized it deserves a proper issue too? No worries. Issues you share to Slack keep their original data — capture images, video, and logs — intact. So the moment you connect a tracker like Jira or GitHub, two buttons appear on the right of that Slack card in the issue list: View details and Promote to tracker.
- View details: reopen the saved capture and logs to take another look. From here you can also hit the pencil-shaped Edit button next to the title or any body section to polish the wording before moving it to a tracker — handy when you shared a quick note on Slack but want the formal issue to read cleanly. Just note that these edits won't change the message you already sent to Slack; they only apply when you promote it to a tracker.
- Promote to tracker: opens the submit dialog (with Slack left out). Pick a tracker, file it as a formal issue, and the card turns into a regular issue while the Slack history is cleared. BugShot also drops a comment linking to the new tracker issue right in the original Slack thread, so teammates following that conversation can see exactly where it landed.
If you haven't connected a tracker yet, the two buttons stay hidden and you'll just see the "Submitted" badge and a shortcut to the message, as before. Connect a tracker later and the buttons quietly show up on the same card. Clicking the card body always jumps to the Slack message — that never changes, so don't worry.
Promote to tracker is blocked while recovery needs attention. After checking the registered Slack message, you can dismiss that recovery with Delete local copies and promote it. Originals kept for promotion are preserved. Expiry alone or uncertain registration does not lift the block.
Why attachment results differ
Uploading a file, linking it to an issue, and inserting its body link are separate steps. BugShot distinguishes an attached file from a missing body link. On paths that prepare files before creating the issue, including Linear and Notion, that step can fail before an issue exists. If a created issue has a recovery notice, check its destination and saved files in Issue Tracking before creating another issue.
How retry differs by platform
Retry attachments only updates an issue (or message) that is already registered; on every platform it never creates a new one. Files reach an issue by different routes, though, so the steps it resumes differ a little. The same account must be connected for it to start.
| Platform | What a retry does |
|---|---|
| GitHub · GitLab | Uploads the file, then fills its place in the issue body with the link. Files reach the issue only through that body link, so a record from before body places were saved can only be downloaded. On GitHub, an upload that was cut off before it reached GitHub (for example, the upload tab navigated away) is uploaded again. |
| Jira | Uploads the attachment to the issue and updates the description. For an upload whose result is unknown, it first checks whether an attachment with that name is already there and uploads only if not. |
| Linear | Upload → attach to the issue → body link, skipping the steps already done. |
| Asana | Like Jira, it checks for an attachment with the same name first, uploads if missing, then fills the link into the description. |
| ClickUp | Uploads the file and updates the body. An upload whose result is unknown cannot be matched by name, so it is not resent; please check the issue. |
| Notion | Appends files that were cut off by the 100-block page limit, or never attached, to the end of the original page. It never creates a new page. Uploads that failed or expired before being attached are uploaded again, but if it cannot confirm whether a file was already appended, it does not append it again, to avoid duplicates. |
| Slack | Re-uploads failed files into the original message's thread. It sends no new message. If it cannot confirm a file reached the thread, it does not resend, to avoid duplicates. |
| Custom Webhook | Not supported. The files go out in one request, so there is no way to tell which part succeeded; please download them instead. |
An upload whose result cannot be confirmed is usually not resent automatically, to avoid duplicate attachments. You will see Result needs checking instead. The exceptions are Jira and Asana, which check for the same name first, Notion and Slack uploads, which are discarded or expire before they are attached to anything, and GitHub uploads cut off before they reached GitHub. Full steps and the cases where retry is unavailable are in Issue Tracking.
Defaults after connecting
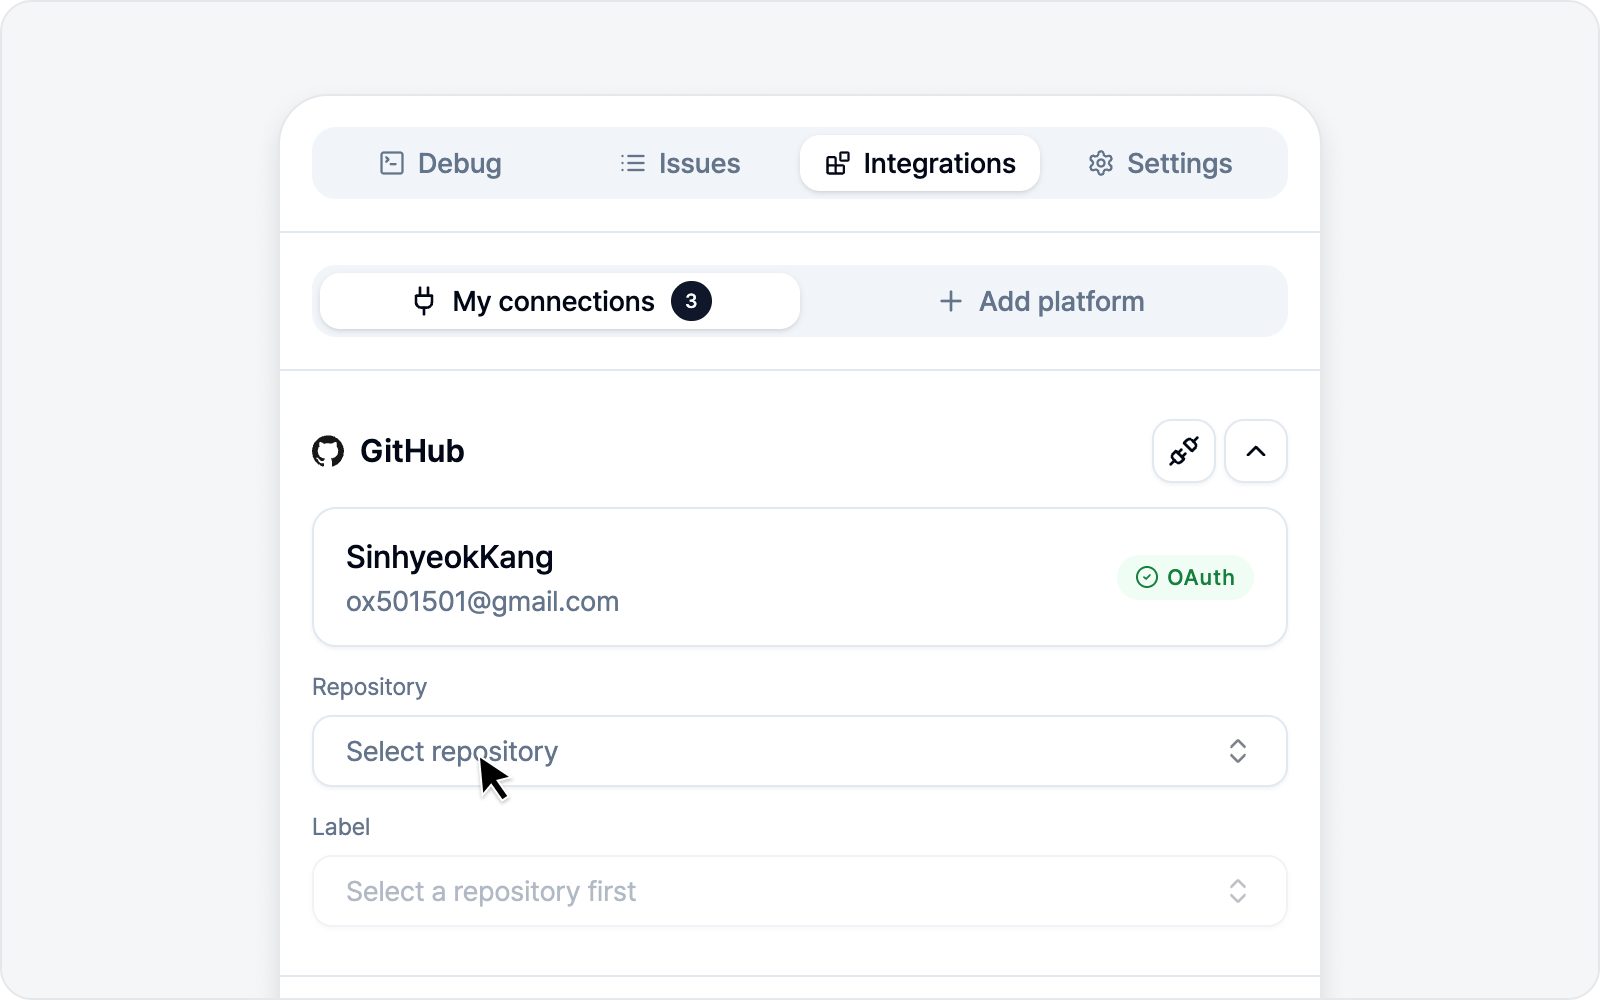 Setting defaults after connecting
Once connected, you can pick a default location for new issues (Custom Webhook has nothing to pick — its destination is the single address you entered) — a project for Jira/GitLab, a repository for GitHub, a team for Linear, a database for Notion, a project for Asana, a list for ClickUp (picked as Workspace → Space → List), a channel for Slack. Set it once and you won't have to choose it every time you write an issue, which saves a lot of clicks.
You can also pre-fill the values that go into the issue. Pick a default Assignee for Jira, GitHub, GitLab, Linear, Asana, or ClickUp (Notion and Slack have no assignee), and while you're there, a default Label (GitHub, GitLab, Linear) or Default issue type (Jira). Whatever you set shows up already filled in when you write an issue — though whoever you picked on your last submission wins. Assign to the same person every time and it just keeps going; assign to someone else once, and that person carries over next time.
A GitHub repository doesn't have to be yours. Type a name, write it out as
facebook/react, or paste the repository's address straight in — a trailing/issuesor the like won't throw it off. Handy for reporting to an open-source project. Repositories that don't take issues are another matter: they show up with anIssues offorArchivedbadge and can't be picked, which beats having your issue turned away at submission time.
To load assignee candidates, pick the location first (a repository for GitHub, a project for GitLab, a team for Linear, a workspace for Asana and ClickUp). Until you do, the assignee field waits, disabled, and tells you what to pick first. Jira is the exception — you can search for an assignee before choosing a project.
One thing worth knowing: changing the location clears the assignee and label defaults under it. A different repository or project probably means a different set of members, and we'd rather clear the field than quietly assign someone who doesn't belong there. Just pick again in the new location.
For Jira, you can also switch the project at submission time. What you pick here is your usual destination; while writing an issue you can move it to a different project from the Project field at the top of the submit dialog. Your connection settings stay put, so the default project you set here doesn't change. Switching projects clears the issue type, assignee, parent epic, and linked issues (they may not exist over there) — priority and CC have nothing to do with the project, so they stay. Right after the switch the issue type list opens on its own so you can pick one straight away, and the submit button stays locked until you do. And the "whoever you picked on your last submission wins" rule above applies to the project too, so the next issue you write opens on the project you just filed to.
If your project runs sprints, you can pick one at submission time too. A Sprint field appears right below Issue type in the submit dialog, listing the sprints that are active or coming up. It's optional — leave it empty and the issue still files fine. The field only shows up after BugShot asks Jira "does this project and issue type have a sprint field?" and hears yes, so it simply won't appear on a Kanban-only project or one with no board attached yet. If the project has several boards, each sprint shows which board it belongs to underneath its name. The "whoever you picked on your last submission wins" rule carries over here as well, so the same sprint is pre-filled next time — and if that sprint has closed in the meantime, the field clears itself.
If you connected Jira through OAuth (the browser sign-in), the sprint list may come up empty. Reading sprints needs one more Jira permission, and an account you connected earlier only carries the permissions it was granted at the time. Reconnect Jira once — see Reconnecting below — and the list will fill in. This doesn't apply if you connected with an API token.
Reconnecting
When a connection drops or a platform needs fresh permissions, just press that platform again under "Add platform". Anything already connected reads Reconnect {platform} instead. You don't have to disconnect first.
If an expiry notice pops up, it's even quicker: press Reconnect in that notice and BugShot takes you to the integrations tab with the platform's connect dialog already open. Not a good moment? Close puts it away.
Reconnecting resets that platform's defaults (location, assignee, label, and so on), so give them another pass afterwards. If you reconnect as the same account, the values you picked on your last submission stay — they're only cleared when you connect as a different account. The dialog spells this out before you go ahead.
Disconnecting
In "My integrations" you can disconnect each platform (the unplug icon), or disconnect everything at once. Don't worry — disconnecting has no effect on issues you've already submitted.