Annotation
Draw on the captured image to mark where the bug is and what it is. Point with an arrow, box it off, jot a note — and the reader gets it at a glance. It's simpler than it sounds, so don't sweat it.
Add, edit, remove
 Annotating
- Add annotation — Start annotating on top of the captured image.
- Edit annotation — Reopen what you've drawn and adjust it.
- Remove annotation — Clear what you've drawn.
Tools
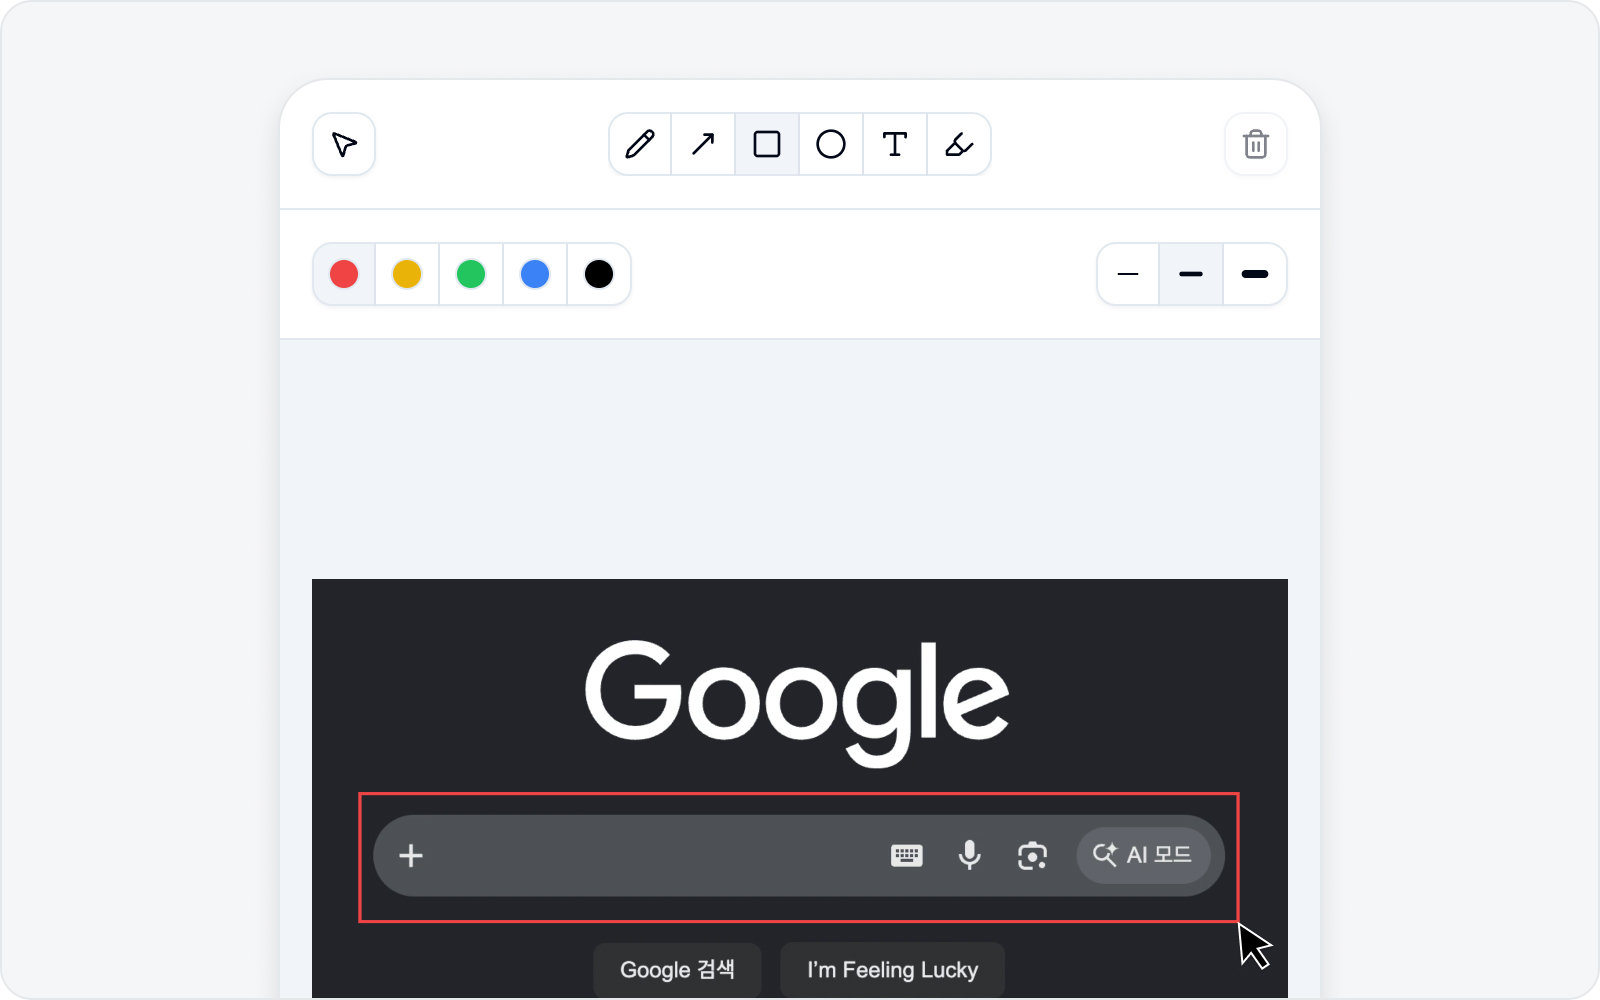
The annotation editor keeps every tool you need right in the toolbar. It's BugShot's own toolbar, so the labels are fully localized — just pick a tool and draw on the image.
- Select — Grab something you've already drawn to move, resize, or change its color and thickness (text uses font size instead).
- Pen · Arrow · Rectangle · Ellipse — Draw freehand, point, box things off, or circle them. These tools let you set the line thickness to Thin · Medium · Thick.
- Text — Drag a box where you want it, then type your note inside. Pick the font size from Small · Medium · Large.
- Highlight — Sweep a highlighter color over an area to emphasize it. Highlight thickness is adjustable too — Thin · Medium · Thick.
Pick a color from Red · Yellow · Green · Blue · Black. Made a mistake? Just hit Undo · Redo, and you can always Delete an annotation you no longer want — so draw freely.
Done
When you're finished, click Done to finalize the image. The annotated screenshot is attached to the issue. Not happy with it? Cancel backs you out, no harm done.
Continue with Write an Issue.