Capture
You can grab a screenshot two ways: Capture area, where you drag a region of the screen yourself, and Capture element, where you click a single element and it crops just that element. Either way the rest of the flow (annotate → write the issue) is identical, so start with whichever feels easier.
Capture an area
 Dragging a region
In the Debug tab, click Capture area.
Drag to select the region you want to capture. You can crop just the part where the bug shows up instead of the whole page, so the reader knows exactly where to look.
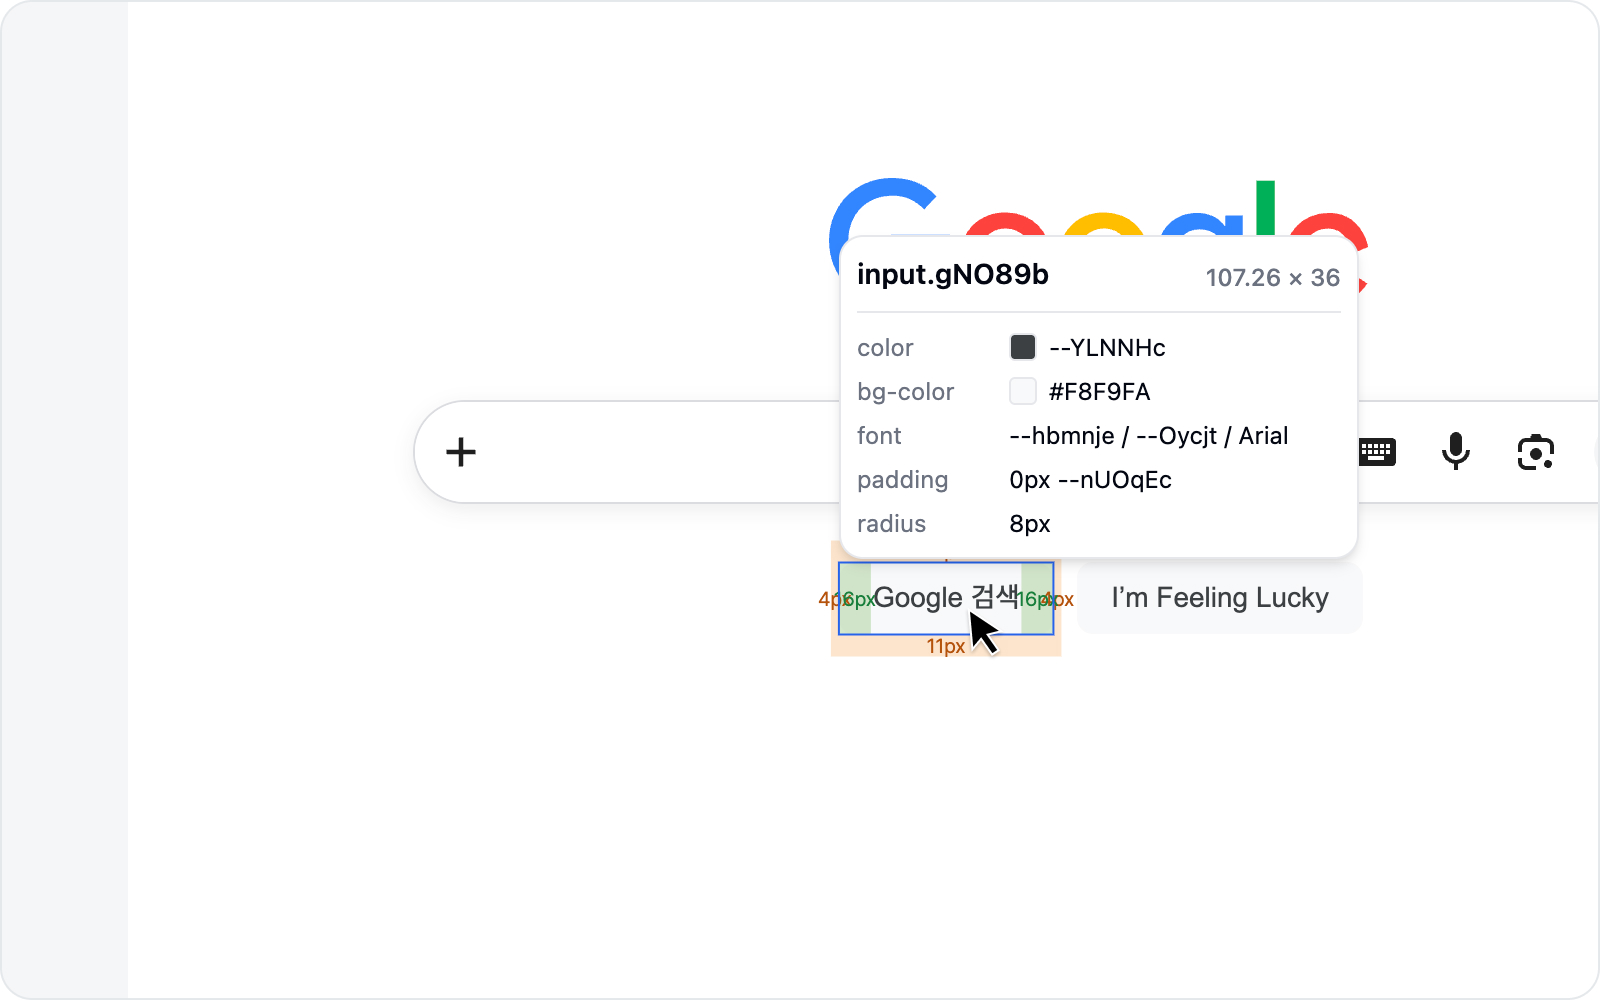
Capture an element
 Capturing an element
In the Debug tab, click Capture element and a crosshair appears over the page. Hover an element to highlight it, then click to crop just that element's region into a screenshot. For elements with clear edges — buttons, cards — it's faster and more precise than dragging by hand.
Capture element doesn't change any styles. To pick an element and compare styles before/after, use Inspect & Style instead.
As a bonus, the captured element's DOM selector is recorded on the issue's Environment as a DOM line, so the reader knows exactly which element on the screen it was.
Output
The selected region (or element) is captured as an image exactly as it currently appears (viewport-based). Once capture is done, you move on to annotation naturally.
See Annotation for how to draw on it.